Shepherd's Hook Forge it Isn't...But it Could Be
 This is a short page I created to show you what is possible using the
basic design shown on my Mini-Forge Page. I built this heating tool in
order to easily do sweat brazed joints to join the heads to the shafts
of various stake tools I make. Some are quite large, such as a 4"
diameter manganese steel ball that is sweat brazed to an upset and
cupped end of a 1" square shaft that was upset to 2" diameter before
cupping. In order to heat that much steel up to brazing temperature you
need a lot of heat, and good insulation. You also need to be able to
keep it in a vertical position with the ball sitting on top of the cup.
It is 14" tall, so there is no way to fit that into a normal forge, and
using a torch is pretty much out of the question if a fully melted join
is to be made.
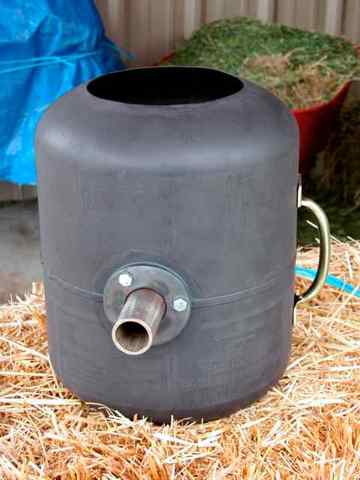
 This
image shows the basic shell, not any different than the one used to
make the Mini-Forge. This will have only a handle on it however, no
legs, floor tile, or fancy burner mounting bracket. The burner mounting
bracket shown in the image is actually one of the 1:12 stainless
burners nozzles for a T-Rex burner.

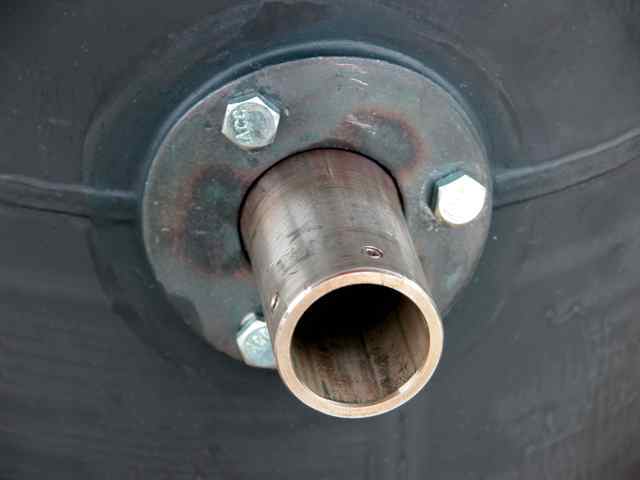
 The
following image shows a close-up of the nozzle assembly that I have
attached for placing a burner into the forge. You can plainly see where
I welded the stainless steel nozzle to the back side of the heavy grade
B washer by the heat blued area at third points around the inner radius
of the washer. This is a case of welding stainless to non stainless, so
I recommend using UTP-65 rod and preheating the work. The welds will
flow together like water if you do. I have bedded the flange on a paste
refractory. Once it was dry I painted the flange, and the area around
it, with high temperature paint. Before mounting it I had painted the
entire exterior and interior of the shell with the same high
temperature paint. No sense having your hard work scale away in use.

 This
image is of the initial firing of the forge to begin the process of
curing the Kaowool. It looks like white on white, which is what it is.
The interior of the chamber is white hot against the white Kaowool. You
can see the glow given off by the hot gases exiting each end. This
first firing only lasted about 10 minutes. Subsequent firings will be
for longer periods. Even at a white hot temperature, the shell and
handle were still stone cold to the touch after 10 minutes.

 This
forge is designed to be used in any position, but usually I will take
the stake tool and stick its shaft in the ground, place the forge over
it so the burner is lined up on the head and shaft joint point, and
fire it off. You could easily cut a 2" to 3" wide slot in the shell
opposite to the handle so you could slip the forge over a long rod for
heating it in the center, and then this would in fact be a "shepherd's
hook forge." You would also need to come up with a way to secure the
Kaowool in place since you would be taking away the arching pressure.
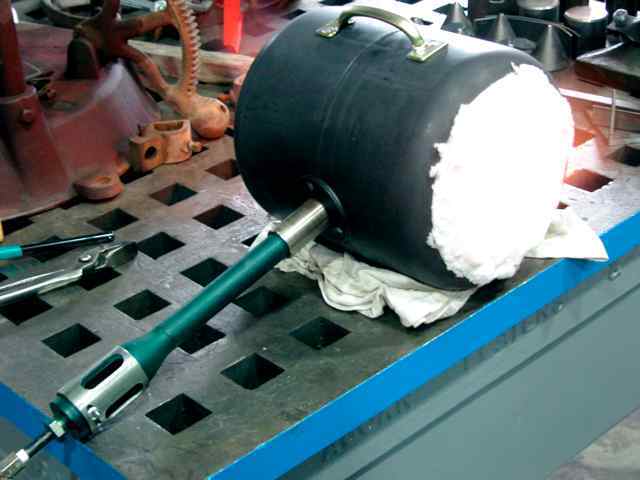
 The
forge as you see it above still has a period of forming and curing
before I coat the interior with ITC-100. As Kaowool is fired it become
dimensionally stable and will not lose its shape. I fire it, then
remove the burner, and as soon as it is cool enough to put my hand inside I
insert a hardwood plug into the burner nozzle from the inside
to maintain the 1:12 nozzle taper through the 1-1/2" of Kaowool in
front
of the burner nozzle. The linked image shows a plug in place inside the
chamber, as well as another plug on the table in front of the forge.
The plugs are turned and then sanded smooth so they will not snag the
Kaowool fibers. When I built and sold forges I always included a plug
inside each burner opening when it was shipped. After a few firings,
and a week with the plug in place, it will
become stable and not need the plug any longer. At that point I will
coat the interior with ITC-100 and it will be ready for many years of
use. I will also clean up the sloppy edges of the Kaowool before
putting it into service, only because I like neatly built equipment.
The
forge as you see it above still has a period of forming and curing
before I coat the interior with ITC-100. As Kaowool is fired it become
dimensionally stable and will not lose its shape. I fire it, then
remove the burner, and as soon as it is cool enough to put my hand inside I
insert a hardwood plug into the burner nozzle from the inside
to maintain the 1:12 nozzle taper through the 1-1/2" of Kaowool in
front
of the burner nozzle. The linked image shows a plug in place inside the
chamber, as well as another plug on the table in front of the forge.
The plugs are turned and then sanded smooth so they will not snag the
Kaowool fibers. When I built and sold forges I always included a plug
inside each burner opening when it was shipped. After a few firings,
and a week with the plug in place, it will
become stable and not need the plug any longer. At that point I will
coat the interior with ITC-100 and it will be ready for many years of
use. I will also clean up the sloppy edges of the Kaowool before
putting it into service, only because I like neatly built equipment.
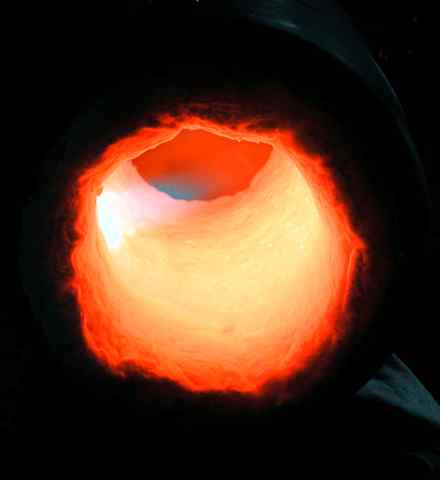
 In
the following image I have stopped down the camera lens to allow the
interior of the forge to be seen while it is running. Notice the almost
invisible flame injection. This is what it should like of you have a
properly working burner installed. This is also what the interior of
the Mini-Forge should look like when running, only due to its end
closure panels it will be even hotter. In the image below I am running
the T-Rex at only a couple pounds of pressure, and the chamber has not
yet been coated with ITC-100. The ITC-100 will increase the chamber
temperature significantly, as well as make its light output intensity
much greater. Working with a chamber as small and hot as this one must
be done with caution due to the IR and UV radiation it emits. Always
wear UV eye protection.

 I should caution you that due to the small chamber size, and the
tremendous heat output of the T-Rex burner, this forge is probably
capable of easily melting steel, so you do need to pay attention to it
when using it. There is no doubt that the T-Rex is much more burner than
is needed for this forge, and Rex Price has a smaller burner available specifically for the Mini-Forge, but the T-Rex
will get the brazing job done very
quickly, so I will continue to use this burner. When sweat brazing I
like to bring up the heat very quickly to complete the braze in as
short a time as possible to reduce scaling of the smoothly finished
working surfaces.
 All
basic design aspects of this forge are the same as for the Mini-Forge.
It uses 2" of Kaowool blanket, has an ITC-100 coating, and the nozzle
flare penetrates into the
shell about 3/4", so there is a little over 1-1/2" of Kaowool that must
be formed into a suitable 1:12 cone in front of the burner nozzle. I
recommend the nozzle penetrate 1" into the Mini-Forge shell, and be
protected with an inch of Kaowool in front of it. Whatever you do, do
not expose the burner nozzle to the heat of the forge interior. It must
be protected by being buried in the Kaowool and having a smooth conical
continuation of the flare opening into the chamber.
Although the forge on this page is a very specialized design, I hope
you will find this
forge information useful.
4 Apr 06
© Golden Age Forge


